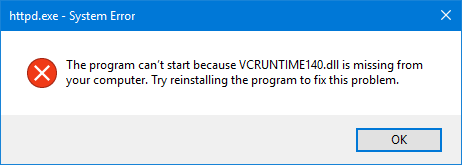
You may receive the error message “The program can’t start because VCRUNTIME140.dll is missing from your computer” when attempting to begin an application. This can appear in a variety of apps, from Skype to HP 3D DriveGuard (accelerometerst.exe).
Let’s go and find out How to Fix VCRUNTIME140.dll is Missing Error?

“The software can’t start because VCRUNTIME140.dll is missing from your computer.” is an example of an error message. To resolve this issue, try reinstalling the software.”
Fortunately, there are several simple solutions to this problem. We’ll go over the simplest and most effective ways to make sure you have the VCRUNTIME140.dll on your PC in this article. Say goodbye to pesky system issues and get back to enjoying your favorite programs in a matter of minutes!
Common causes of the “VCRUNTIME140.dll” is missing error
This, like most of Windows 10’s other faults, has a number of potential reasons. This is owing to the system’s size and complexity, which means that one mistake might lead to another.
Tip: Anyone can use all of the approaches in this post because our instructions are simple to follow and don’t require any prior knowledge of Windows 10. Don’t forget to refer us to anyone you know who is having problems with their computer!
Using the active and helpful user base of Windows 10, we were able to track down and compile the most prevalent causes for the “VCRUNTIME140.dll is missing” error.
- The VCRUNTIME140.dll file has been deleted or corrupted. The main cause of this error is the fact that important .dll files needed by the application have been deleted. Without that file, you won’t be able to launch the app you’re trying to use, and you’ll need to restore or re-download the file.
- Known errors in Adobe’s Creative Cloud. Adobe has addressed a Creative Cloud issue. This issue occurred after migrating from the Microsoft runtime to Visual C ++.
- Visual Studio 2015 files are corrupted or missing. The VCRUNTIME140.dll file is related to Visual Studio 2015. It may be missing from your computer or corrupted by an app, system, or malware.
- The system is infected with malware. Your system may be infected with a virus or malware. As a result, VCRUNTIME140.dll may be corrupted or corrupted.
Corrupted system file. System files are often vulnerable to errors and corruption, especially after resetting Windows 10 or processing malicious applications.
Note that these are not all causes. You may have a unique problem. However, the methods in the next section will help you fix this error easily.
Now that we have investigated some possible causes, we can start troubleshooting. For this nasty error message, there are several easy and easy ways to do it.
How to Fix VCRUNTIME140.dll is Missing Error on Windows 10?
- Re-register the VCRUNTIME140. DLL file.
- Run System File Checker.
- Reinstall the latest Visual C++ Redistributable for Visual Studio 2015.
- Repair Microsoft Visual C++ 2015 Redistributable.
- Run a PC repair tool.
- Reinstall the program that cannot be launched.
- Install Windows Updates.
Let’s discuss these methods in detail!
Method 1: Re-register the VCRUNTIME140.dll file
You may be able to resolve the issue by re-registering the missing .dll file using a command prompt. To do this, follow the steps below to run the command in the appropriate way.
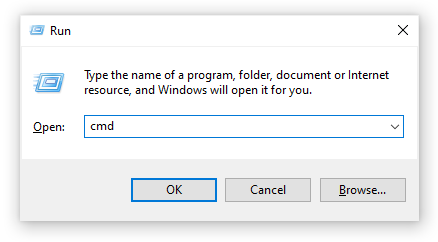
Press Windows Key + R on your keyboard to open the Run utility. Here enter “cmd” in the input field. When done, press Ctrl + Shift + Enter to launch Command Prompt as administrator.

- If prompted, allow the Command Prompt to make changes on your device by pressing the “Yes” button.
- First, you need to un-register the file. You can do this by typing in or copy-pasting the next command, then pressing the Enter key: regsvr32 /u VCRUNTIME140.dll
- Afterward, you’ll need to re-register the file. This can be done with the following command — make sure to press Enter after you input it: regsvr32 VCRUNTIME140.dll
- Close the Command Prompt window and attempt running the problematic application again.
Method 2: Run the System File Checker (SFC scan)
By default, System File Checker is a tool available in Windows 10. It is also famous as a “SFC Scan” and is the fastest way to automatically repair damaged system files and other problems.
1.Press Windows + R keys on your keyboard to launch the Run utility. Type “cmd” and press Ctrl + Shift + Enter. This will open the command prompt with administrator rights.

2.If prompted, make sure to allow the Command Prompt to make changes on your device. This means that you might need an administrator account.
3.Type in the following command and press Enter: sfc /scannow

4.Wait for the System File Checker to finish scanning your computer. If errors occur, you can automatically fix them yourself using the SFC command, which can also fix related errors.
Method 3: Reinstall Visual C++ Redistributable for Visual Studio 2015
Many professionals recommend simply reinstalling Visual C ++ Redistributable for Visual Studio 2015 if you encounter problems with associated .dll files. To do this, you can download the relevant files directly from Microsoft.
1.Click here to go to the official download page for the Microsoft Visual C ++ Redistributable Package. Here, all you have to do is select the language and click the “Download” button.

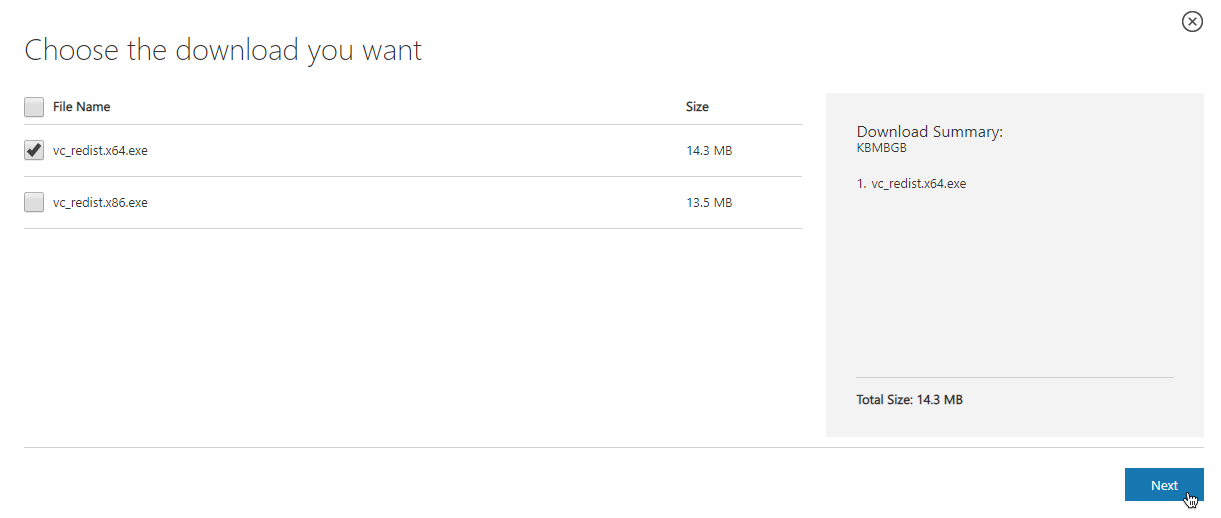
2.You’ll see two available downloads:
- If you have a 64-bit system, select vc_redist.x64.exe.
- If you have a 32-bit system, select vc_redist.x86.exe.
3.After selecting the appropriate file, click the “Next” button. Wait for download — It may take some time depending on the connection.

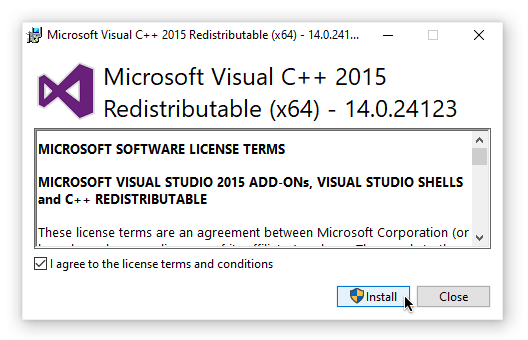
4.Open the downloaded file. This will bring up the installer wizard. The first thing you need to do is check the “I accept the terms of the license agreement” option and then click the “Install” button.

5.Wait for the installation process to complete. You may need to restart your computer and then check if you have had any problems with applications.
Click here to read more how to articles.


Thank you for sharing such an amazing information