The following are the several methods for managing user accounts on your Windows 10 machine.
Creating an account on Windows 10 is normally done during the initial setup process. There are, however, a slew of other settings you can tweak to improve the account and make it even more safe.
To share a Windows 10 machine with family and friends, you can establish multiple accounts with different permission levels. This means that each user would have their own personal place with a customized experience and a separate storage area.
If you want to share a device with a child, Windows has the opportunity to establish a child account with features that are specifically meant to safeguard them from inappropriate content (such as apps, games, and websites).
How to view account details on Windows 10
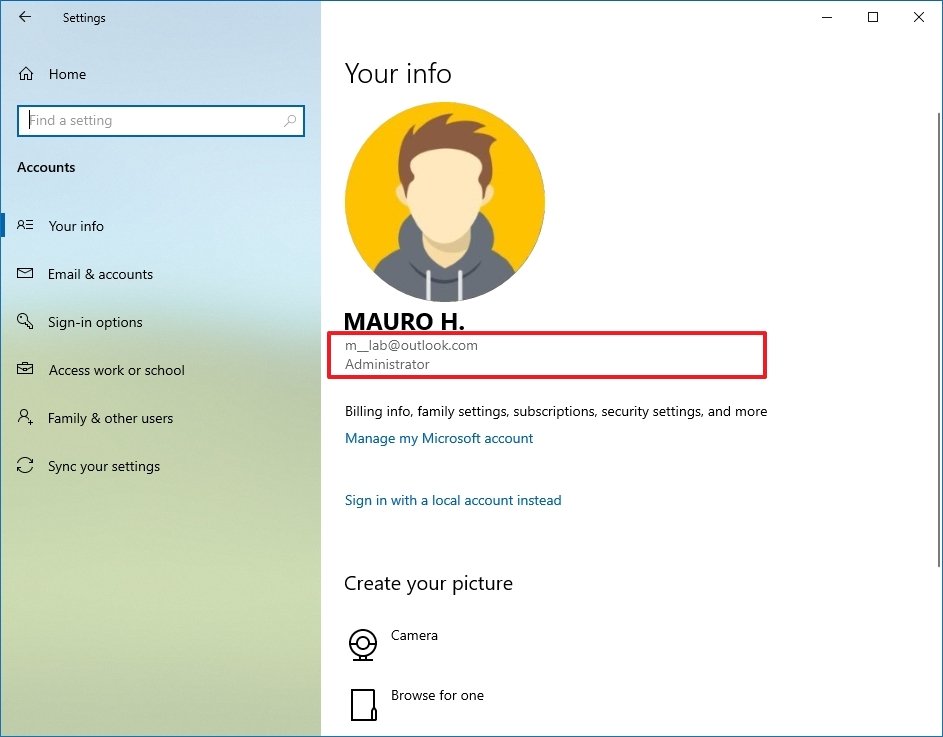
The Your Info screen in the Settings app contains your account information as well as the opportunity to link your local account to a Microsoft account. Additionally, you can modify your profile photo on this page.
View account information
To view your Windows 10 account details, use these steps:
- Open Settings.
- Click on Accounts.
- Click on Your info.
- Confirm your account details, including account type (Administrator or Standard) and whether you’re using a local account or Microsoft account.

- Quick note: If the page reads “Local account” under your username, the account isn’t connected to a Microsoft account. If your email address appears on this page, you’re using a Microsoft account.
- (Optional) Click the Manage my Microsoft account option to adjust billing details, family and security settings, and other settings online.
Once you complete the steps, you’ll better understand the account information on Windows 10.
Switch to local or Microsoft account
To switch from a local account to a Microsoft account, use these steps:
- Open Settings.
- Click on Accounts.
- Click on Your info.
- If you have a local account, click the Sign in with a Microsoft account instead option to link the account with a Microsoft account.

- Continue with the on-screen directions.Quick tip: If this is a new account, you may need to click the Verify button to verify your identity. Only after entering the verification code, you’ll be able to have full access to the account.
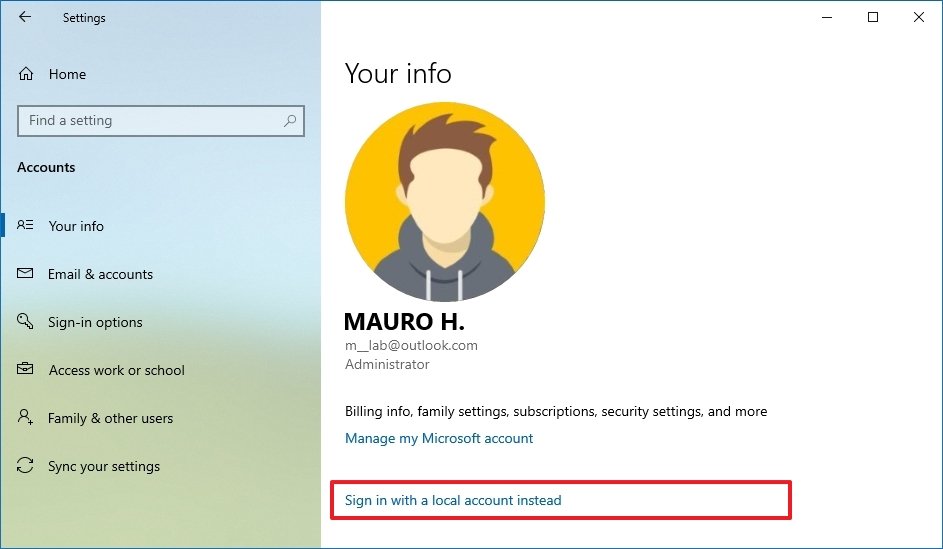
- If you have a Microsoft account, click the Sign in with a local account instead option to switch to a local account.
- Continue with the on-screen directions.
After you complete the steps, the account will switch to a Microsoft or local account, depending on your configuration.
Change account picture
To change your Windows 10 account picture, use these steps:
- Open Settings.
- Click on Accounts.
- Click on Your info.
- Under the “Create your picture” section, click the Browse for one button.

Quick tip: You can also use the Camera option to take a picture with the webcam and set it as your profile picture.
- Select a new image for the account.
- Click the Choose Picture button.
Once you complete the steps, the account pictures will appear across Windows 10 experience, including the Sign-in screen.
How to add more email and app accounts on Windows 10
Windows 10 also allows you to add multiple accounts, so you don’t have to re-enter the same information to access an app or service.
Add accounts for apps
To set up additional email and app accounts on Windows 10, use these steps:
- Open Settings.
- Click on Accounts.
- Click on Email & accounts.
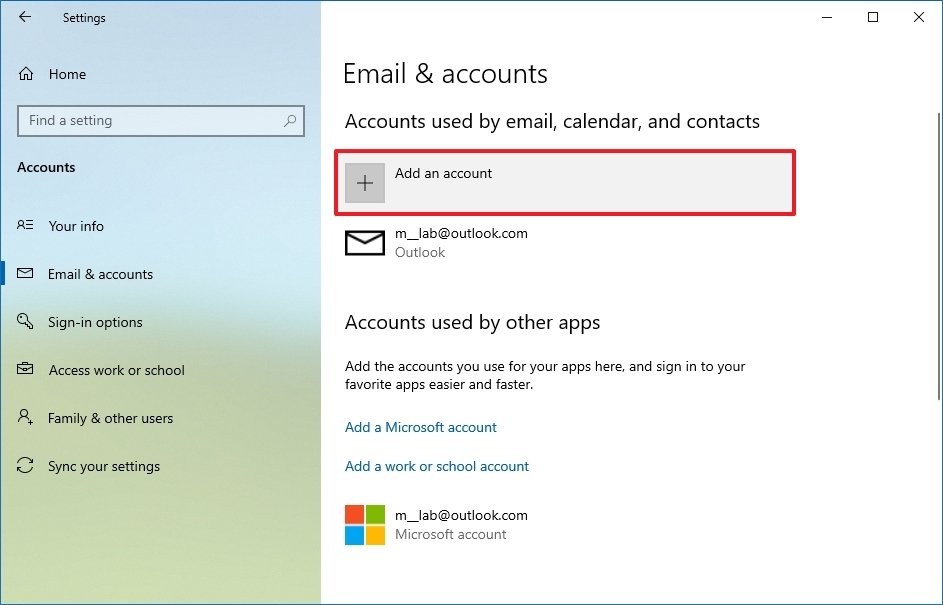
- Under the Accounts used by email, calendar, and contacts section, click the Add an account button.

- Select the service provider — for example, Outlook, Google, or iCloud.
- Continue with the on-screen directions.
After you complete the steps, the account information will be available to connect with Microsoft Store apps.
Add accounts for work
To add work accounts for apps, use these steps:
- Open Settings.
- Click on Accounts.
- Click on Email & accounts.
- Under the “Accounts used by other apps” section, click the Add a Microsoft account or Add a work or school account.
- Select the correct service.
- Continue with the on-screen directions.
Once you complete the steps, you will be able to quickly set up apps for work, such as OneDrive for business.
Source of article.
Click here to read more useful and interesting articles.

